Over the last couple of months a few people have asked me how I base my figures…so while I was working on my entry for the painting contest over at Warhammer-Empire I remembered to take some pictures of the process. Please note that some of these pictures were taken on my wife’s iPhone so are not of the highest quality…but I think they are good enough for this walk through. If you have questions please let me know.
Until a year ago I had only based a handful of figures…Ever. Thanks to the encouragement of Bugman’s members like Jimmytrout and CDO member Clam who liked the painting I was doing on figures but pointed out that they were not really “done” until they were properly based I was finally motivated to figure out a basing style for my figures. I wanted a system that was fairly quick, not too elaborate, and appropriate for gaming figures…which I consider all my figures…even though I haven’t had a game in 15 years! After a thorough search of the web for walk-through and tutorials I settled on my system. It is outlined below.
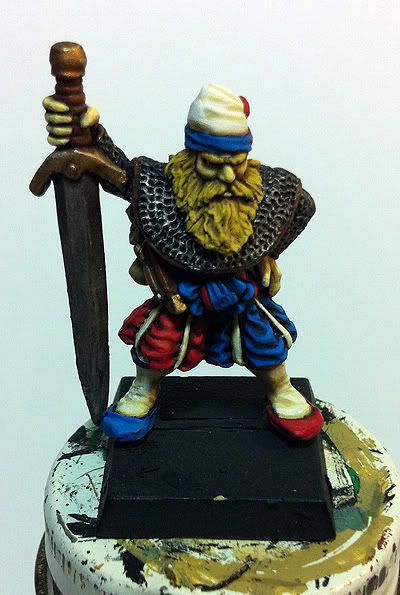
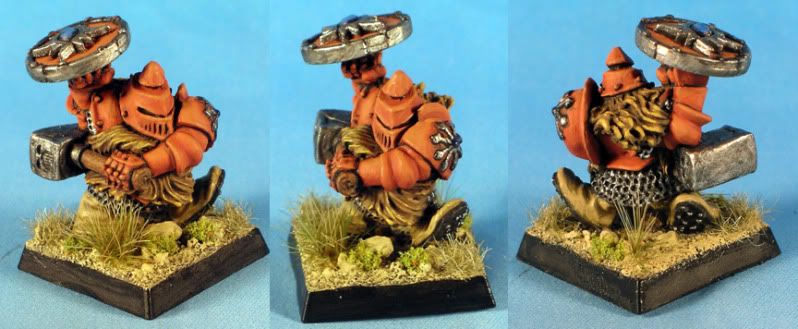
The Victim:
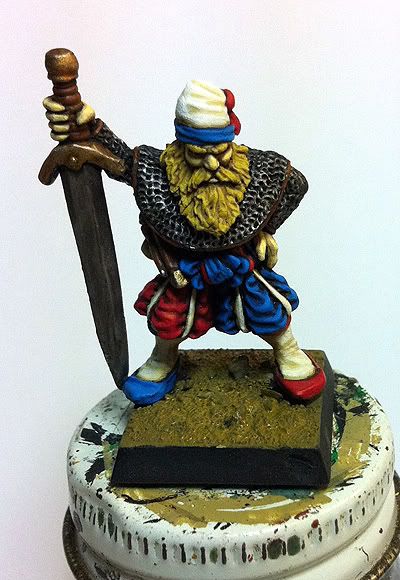
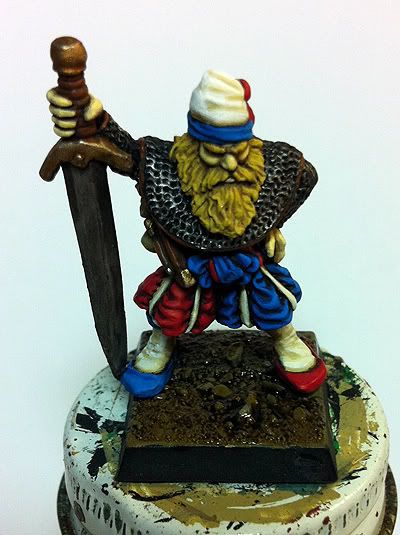
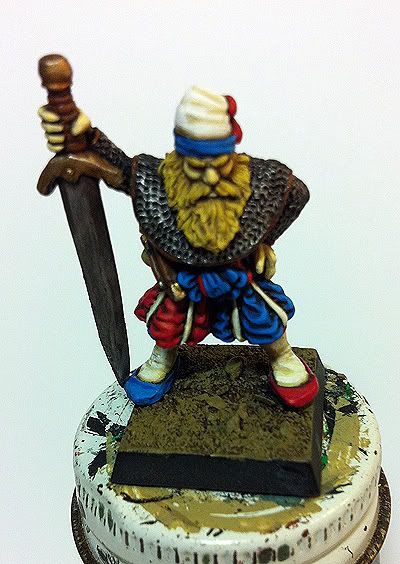
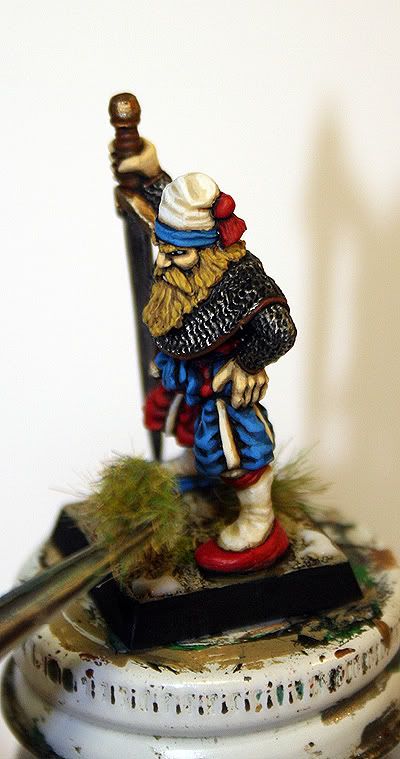
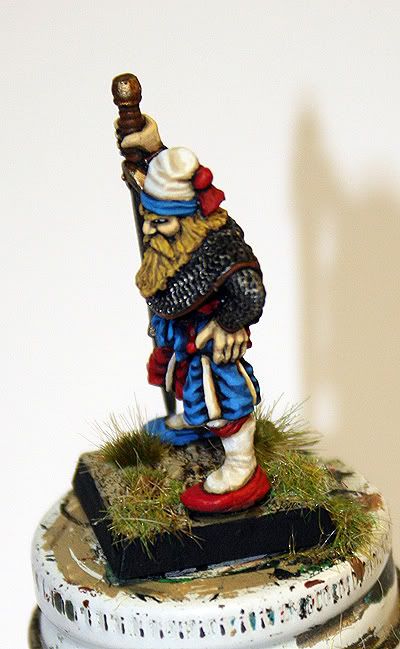
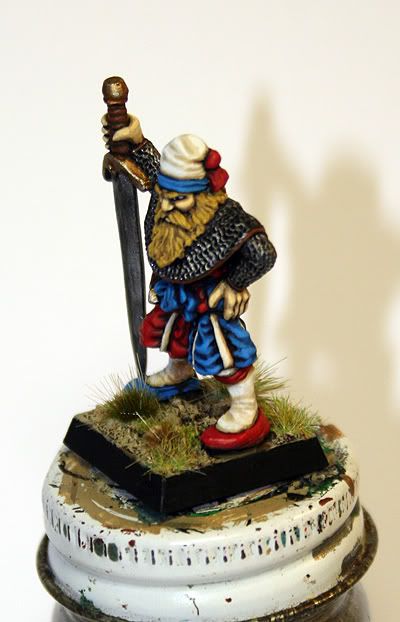
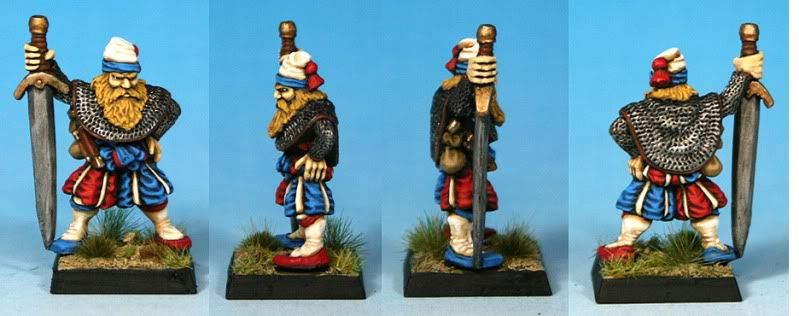
For this walk through I will be using this recently completed Marauder Empire Champion (one of my favorite Empire figures EVER). I chose him because he has a fairly open base that will allow me to demonstrate my technique easily…and I needed to finish him for the contest anyway…
STEP 1: Sand the Base
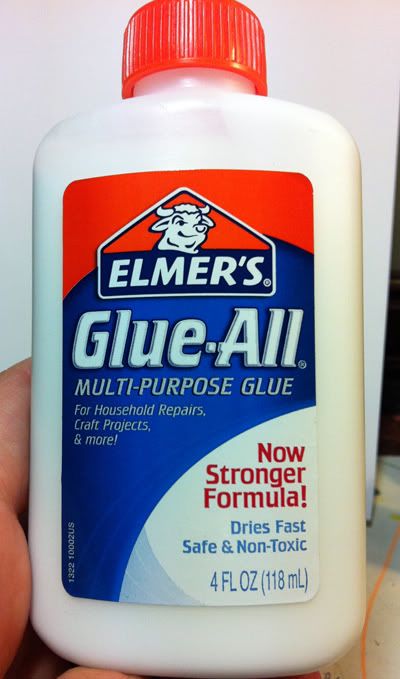
The first thing I do with my bases is to cover them with sand. To achieve this goal I first apply White Glue (PVA)…typically Elmer’s…using a coffee stir stick. Put a fairly thick layer on the entire surface of the base…but try not to get any on the feet of the figure.

For sand I use some that I stole from my kids sand box….it has a good mix of grain sizes.

Take the figure and ”dip” the bases into the sand…making sure that grit gets on all the glue.
Lift it out of the sand and tip it to the side…tap it with your figure to shake off the excess sand.
Then set him aside and let the glue dry…here is the sanded base

STEP 2: Paint the Base
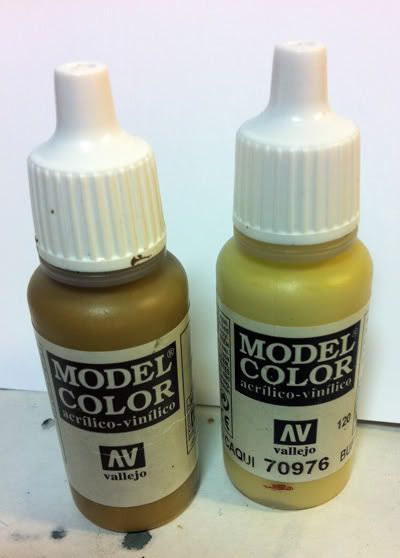
Now that the base has texture its time to get some color on it. I will be using these two colors on my base. They are Vallejo Model Colors Paints…the one on the left I believe is called Khaki (but as you can see its not labeled) the one on the right is 976 Buff.
To start with I thin the Khaki with a bit of water and paint it onto the base with a fairly thick layer.
This is followed by a heavy wash of GW Delvan Mud
Once that is dry I drybrush the whole base with straight Khaki…this is a heavy drybrush…just leaving the wash in the deeper recesses.
I follow this with a lighter drybrush of 50% Buff and 50% khaki

NOTE: with my Chaos Dwarfs and their allies…I use straight Buff for this second Drybrush…it gives a more “Arid” feel to the base. Adjust your colors as needed to fit your armies “theme.”
STEP 3: Add Vegetation
For dessert based armies you could stop at this point…but even a few pieces of grass, or a tuft or two can really make a base look sharp. Here is how I do it.
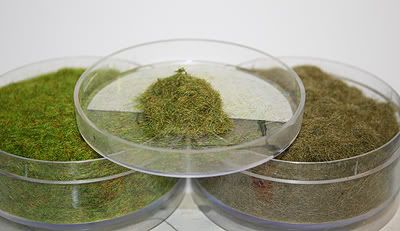
I start with placing some greenery in to the recesses around the larger pieces of sand on the base…these represent small plants that have found some shelter in and around larger rocks. For this I use Gale Force 9’s “Spring Undergrowth” flock blend
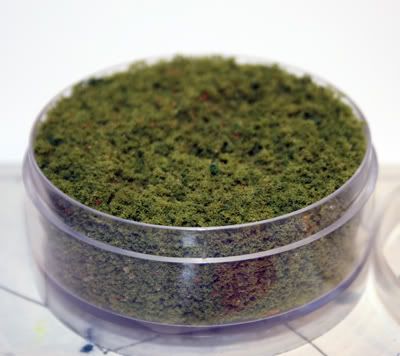
I put a small drop of White Glue into these spaces with my stir stick then use tweezers to place the flock into the glue drop. These are very small pieces of flock….that container should last me through about 5 armies at the rate I use it. But its one of those things that if you skipped this step you would miss them in the final result…despite their small size.
Next I place several small Tufts around the base. There are now several brands of pre-made tufts available to the hobbyist…the ones I use are by Silflor and I am very happy with them. They are available in the US from Scenery Express: http://www.sceneryex...s.asp?dept=1217 In Europe I would get them from Antenocitis Workshop: www.antenocitisworkshop.com I suggest buying the large packet of your chosen color because it comes with enough tufts in both 4mm and 6mm to do a whole medium sized army…and they are super easy to use.
NOTE: these are the same tufts sold under the Army Painter brand…AP buys them in bulk and cuts them down into those tiny packages they sell and doubles the price! Buy the Bulk packs from one of the folks listed above and you will get WAY more tufts for your money…plus AP tufts only come in 6mm which is too big for many 20mm bases.
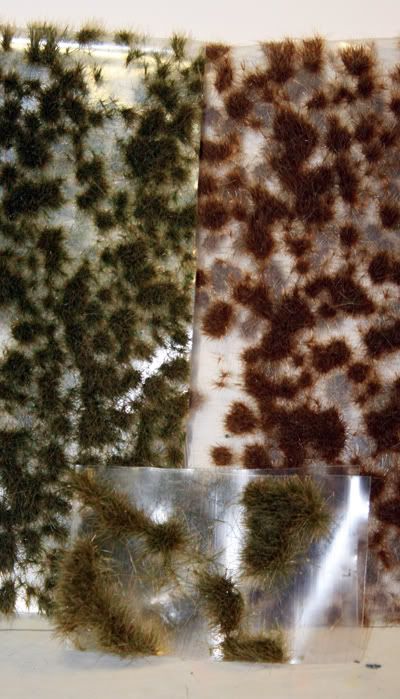
Here are the sheets of tufts I used for this figure In the back are 2 sheets of 4mm tufts in green and brown. In the front is a small sheet of 6mm tufts.
These are picked off their backing sheet with tweezers…the bottom of the tuft is dipped lightly into the PVA and placed into relatively flat spots on the base.
I typically put 2-4 tufts on a base…mixing the colors as I feel the need. Don’t get too carried away with the tufts…I’ve found that with basing “Less is More”…In my mind the base is there to accentuate the model…not overpower it…but again I digress… With 20mm bases I typically use mostly the 4mm tufts…I squeezed one 6mm tuft on the backside of this figure. You have much more ability to use the large tufts with 25mm (and up) bases.
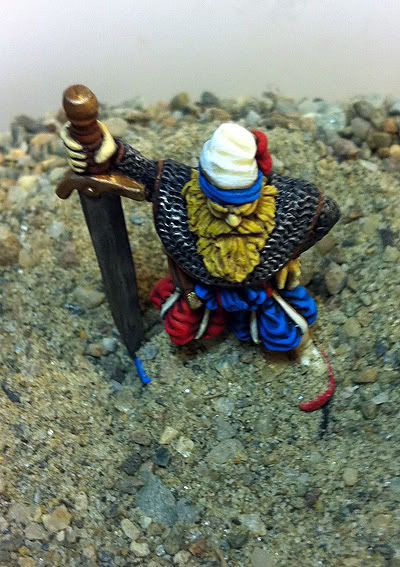
Here is the base with tufts in place…glue still wet
The final Foliage I put on my bases are small patches of static grass. I use a mix of Gale Force 9 Static Grasses…in roughly equal proportions…Green Grass and Dead/Winter Grass…I’ve taken an old film canister and filled it with my custom mix…it will last for many…many figures…
To place the static Grass I put a couple of patches of glue directly onto the base…
…Then drop a heap of mixed Grass onto the glue.
Don’t be shy…get some on there!
Set that aside for 1-2 minutes and allow the glue to tack up and grab onto the grass…then tap off the excess grass that isn’t stuck in the glue (much like we did for the sand earlier). At this point I often blow on the patches as well…this causes other loose grass to come off as well as causing the grass that is staying to stand up a bit better.
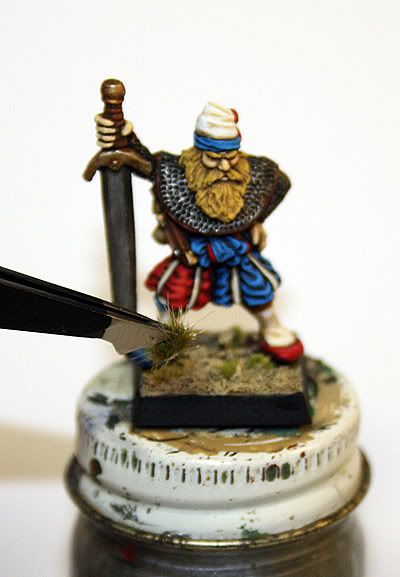
The final step in the process involves removing unwanted blades of grass from the base. Once the glue is dry I use my best tweezers to pull off pieces of the static grass or tufts that are too tall, touching the figure, hanging off the base, going in the wrong directions etc…etc… Now don’t get to carried away here…just pick off the ones that annoy your sense of “style”…again this is a really easy step to skip but makes a big difference in the overall feel of the base…IMO…YMMV.
STEP 4: Take some Decent Pictures
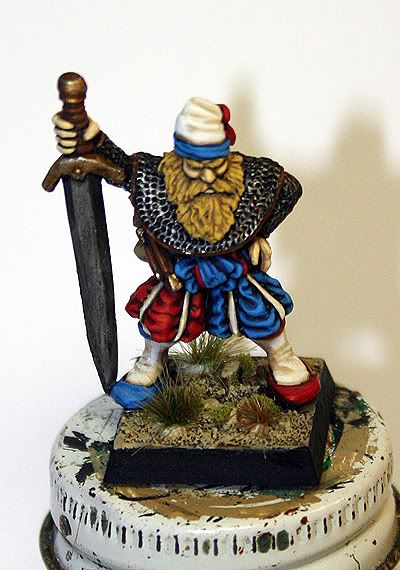
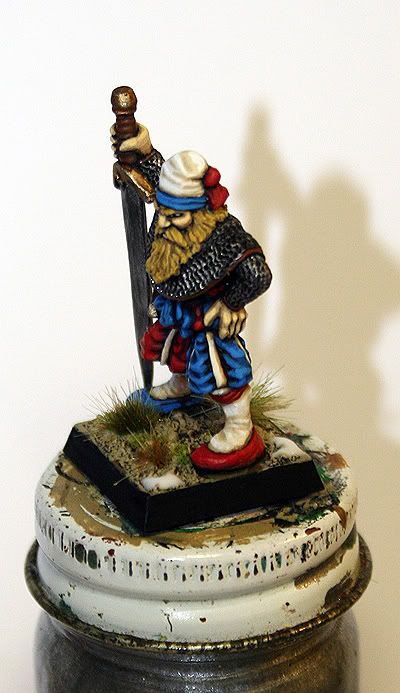
Here is the final product:
I hope this is helpful for others who are reluctant to base their figures….this system is fairly fast…quite cheap when the cost is spread out over the many dozens of figures these supplies will complete…and quite easy…If I can do it…you can too!
Cheers,
Blue